
Public engagement project
Christmas Lectures from The Royal Institution
Hands-on science to do at home
Active
November 2022
January 2023
Professor Dame Sue Black is hosting the Royal Institution Christmas Lectures for 2022. She will tell us all about the detective process she uses in her work as a forensic scientist. Sue's lectures will cover things like our bodies, how clues are found at a crime scene and how evidence is presented in a courtroom. You can watch the Lectures on BBC Four and iPlayer at 20:00 on 26, 27 and 28 December.
We have created some forensic science activities that you can try at home.
You can download the pack here along with our fingerprint template and the tape-lift examination sheet.
What is a forensic scientist?
You may have seen forensic scientists on TV or in a detective novel. In the real world, a forensic scientist is someone who uses science to provide information to the courts of law to help judges and juries come to a decision about who may be responsible for a crime.
What do forensic scientists analyse?
Wherever we go and whatever we do we leave traces of our presence behind us. If these traces are recovered and provided to forensic scientists then they can perform scientific tests to determine what the traces are and evaluate what finding them means in respect a possible crime being committed. Traces include fingerprints, DNA, footwear marks, hair and/or fibres from our clothing.
Who sat in Santa’s chair?
Someone has been sneaking into Santa’s office and sitting on his chair when he’s not around.
Some clothing fibres were collected from Santa’s chair. It’s likely that these came from a piece of clothing like a jumper or a hat. Help us figure where they came from!
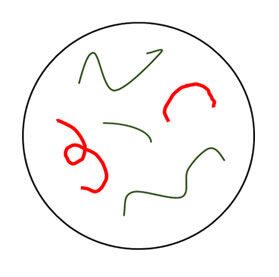
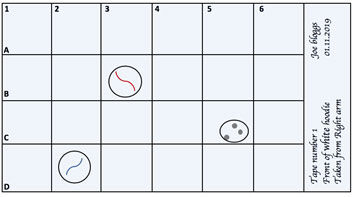
Magnified fibres found on Santa’s chair
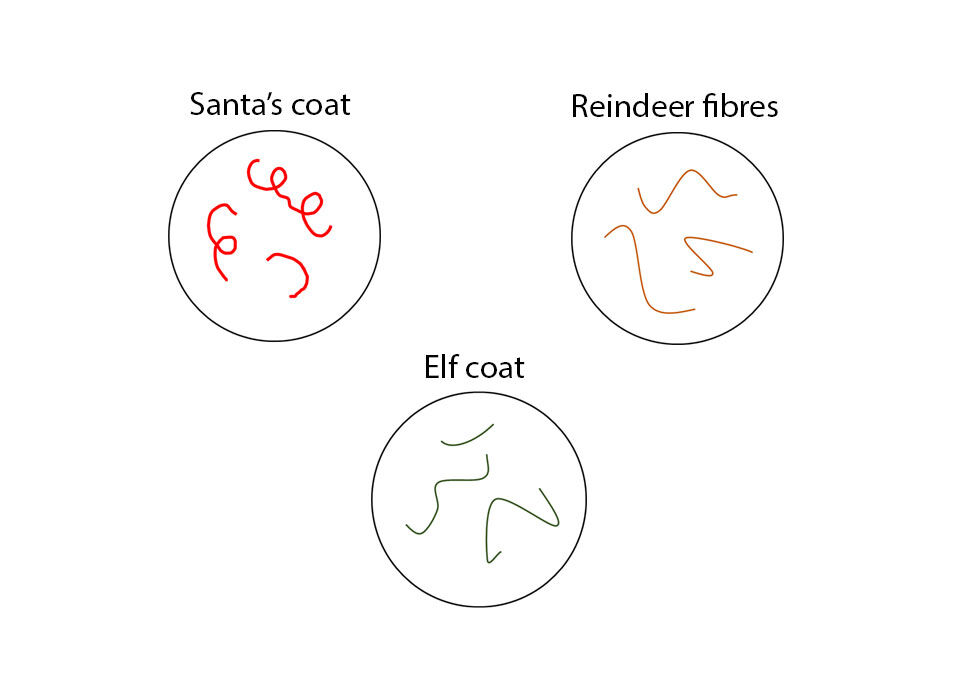
What features of the fibres make them different to each other?
Which fibres match the ones found in Santa’s Office?
Finding fibres
In this experiment you will recover traces of fibre evidence from clothing using methods similar to the ones forensic scientists use in their laboratories!
A forensic scientist would usually place the Sellotape on the acetate and draw the grid onto that. We’ve adapted the method for you to try at home.
What you’ll need:
- Roll of wide, clear Sellotape or sticky acetate (ideally around 25mm wide)
- Scissors
- Felt-tip pen
- Items of clothing that have been worn recently
- Paper to create your examination sheets
- you can download and print our examination sheet or make your own with a ruler and pencil.
- Magnifying glass (if you have one)
Before you get started, make sure you have an examination sheet!
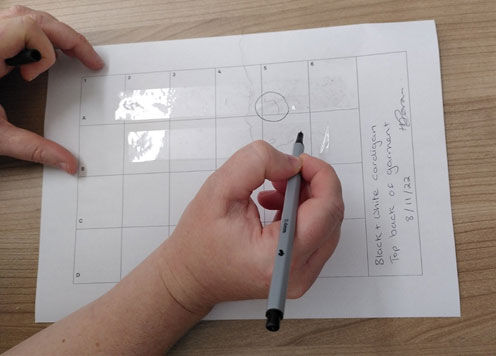
You should use one examination sheet for each item of clothing you investigate. To make your Examination sheets find a blank A4 sheet of paper and draw the grid onto it (use a ruler if you have one!)

The text on the right of the sheet shows what information you should be recording, including your name, the date, the piece of clothing you are examining and where on the clothes you are lifting fibres with tape.
Instructions:
Step 1: Find a flat surface to work on. Make sure it is clean and free of anything that could contaminate your experiment.
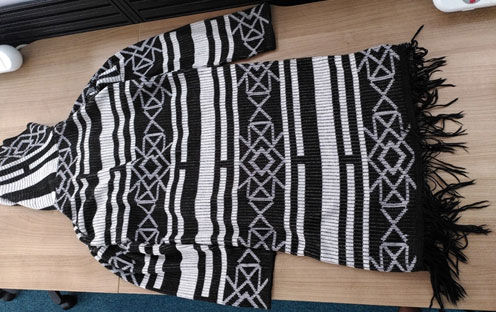
Step 2: Lay down one item of clothing and pick one area you will work on, for example the right sleeve of a sweater.
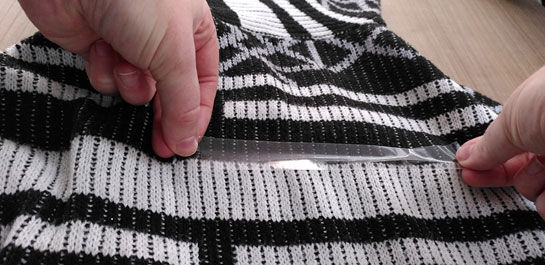
Step 3: Carefully peel off a piece of tape from the roll (around 10cm).
Step 4: Hold both ends of the piece of tape and press the sticky side down onto the area of clothing. Make sure you press down the surface of the tape to ensure it sticks to the clothing.
Step 5: Lift the tape and repeatedly stick it on the fabric a number of times to cover the area you are working on. Then stick the tape onto the examination sheet. Make a note of which area of the garment each of your pieces of tape are from (these are the areas A, B, C, D on the examination sheet).
Step 6: Repeat this process again so you have multiple pieces of tape on the same examination sheet.
Step 7: Using your eyes, or with the aid of a magnifying glass, carefully look at the materials that you have collected from the clothing.
What can you see – are there any fibres from other clothes or fabrics? Are there any other materials like dust, hair, or dirt?
Step 8: As you examine the sheet, use a felt tip pen or sharpie to circle any particles or fibres that are not originally from your piece of clothing (e.g. different colour or fibre material).
Step 9: Try the experiment again with another item of clothing and see if you find anything different. You can also try using clothes that are different colours or made of different materials to see if you find anything new!
Top tip: Don’t worry if you don’t find many materials. A lack of evidence can also give us information. Maybe the clothing you picked is new or recently washed or maybe it’s made with a fabric that other material is less likely to stick onto.
What’s going on?
Small pieces of materials can transfer between people and between objects and people. If these materials persist on the surface that they have transferred to, then they may be recovered when examined by forensic scientists. Materials such as small fragments of glass, fibres, paint, hairs, soil, pollen, gunshot residues and others are often encountered in forensic casework.
Fibres are analysed to find out what material they are made from and/or what dyes have been used to colour them. This can give forensic scientists information to determine whether a fibre may have come from a particular source.
Fibres may that someone was present in an area, for example if fibres from an item of clothing were found on a chair it may suggest that a person wearing that item of clothing had sat on the chair. However, because clothing is often mass produced there may also be multiple possible sources of the fibre and the forensic scientists has to evaluate their findings with this in mind.
What can you identify from the tape-lifts you have created?
Connect with us at the Leverhulme Research Centre for Forensic Science at the University of Dundee to find more forensic science experiments and virtual games you can try at home.